Category: Recipes

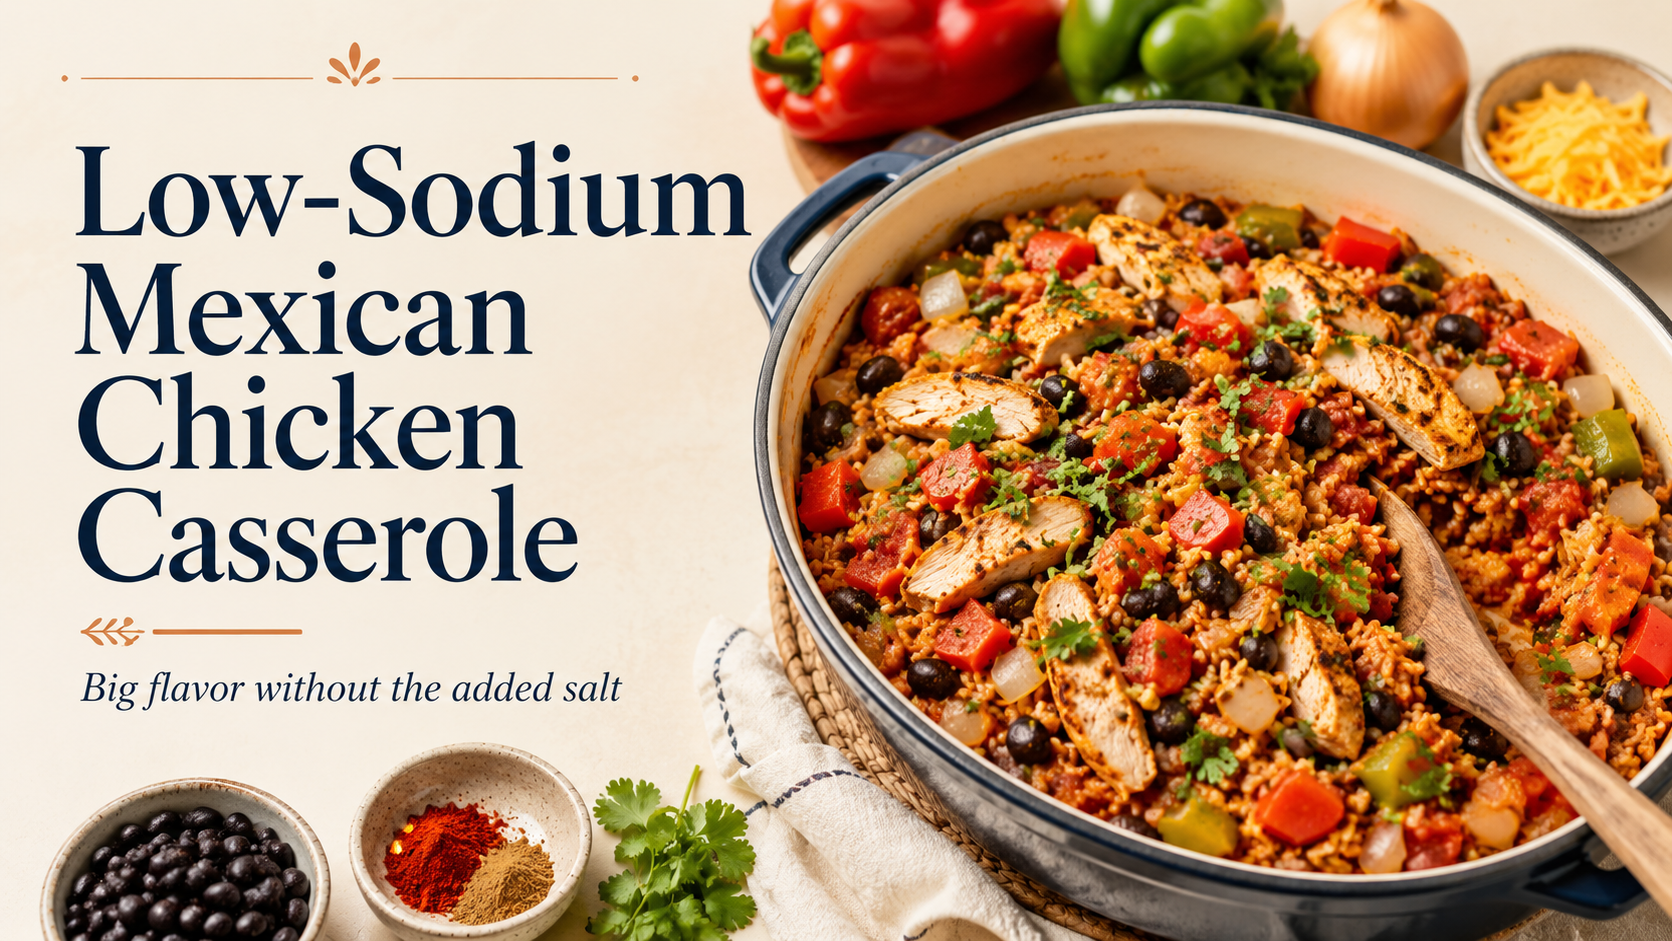
  • Low-Sodium Mexican Chicken Casserole

    Low-Sodium Mexican Chicken Casserole

    There are some recipes you find that just work.

    This Mexican casserole is one of those for our family.

    The original recipe came from Luci’s Morsels and is called One Pot Mexican Rice Casserole. We liked the basic recipe right away, but the original version contains ingredients that can add a lot of sodium, including added salt, regular canned beans and tomatoes, and a generous amount of cheese.

    So we changed it.

    The result is one of those meals where I don’t feel like I’m eating a sad low-sodium substitute.

    It still has plenty of flavor.

    And that matters.

    We Cook Our Protein Ahead of Time

    One thing we do differently in our house is cook meat in bulk.

    Living in Florida, standing over a grill around dinner time is not always particularly appealing.

    It’s hot.

    Really hot.

    So once or twice a month, we grill a large amount of protein at one time.

    We do this with things like:

    • Chicken
    • Pork
    • Tuna

    We season everything with no-sodium spices, cook it on the grill, portion it out, vacuum seal it and freeze it.

    Then when we want to make something like this casserole, most of the work is already done.

    The grill also gives the meat plenty of flavor without needing salt.

    For this recipe, we just thaw some of our grilled chicken, chop or shred it, and it is ready to go.

    The Biggest Change: Lose the Salt

    The original recipe calls for 1½ teaspoons of salt.

    We leave it out completely.

    That one change eliminates roughly 3,450 mg of sodium from the entire recipe before changing anything else.

    And honestly?

    We don’t miss it.

    There is already a lot going on in this dish.

    You have onion.

    Bell peppers.

    Garlic powder.

    Chili powder.

    Cumin.

    Paprika.

    Pepper.

    Chili flakes if you want a little heat.

    There is plenty of flavor.

    If you taste it and think it needs something, add more of the salt-free spices.

    We have never found this casserole bland without the added salt.

    No-Salt-Added Black Beans

    The second change is easy.

    We use no-salt-added black beans.

    These are a staple in our house anyway. I add black beans to salads all the time, so we usually have several cans in the pantry.

    We normally buy ours at Walmart.

    Regular canned beans can contain a surprising amount of sodium, so this is one of those really easy substitutions that can make a meaningful difference without changing the recipe.

    Drain them and add them exactly the same way you would regular black beans.

    No-Salt-Added Tomatoes

    Same idea with the tomatoes.

    We buy no-salt-added canned tomatoes.

    Again, no complicated substitution.

    No change in how the recipe cooks.

    You are just removing another source of unnecessary sodium.

    Between eliminating the added salt and switching to no-salt-added beans and tomatoes, you have already taken a huge amount of sodium out of the original dish.

    What About the Cheese?

    This is where our family handles things a little differently.

    The original recipe calls for 1 to 1½ cups of shredded cheese melted over the casserole.

    We don’t put the cheese into the casserole at all.

    Instead, we serve it on the side.

    Other members of my family are not sodium restricted, so if they want cheese, they can add it to their individual serving.

    Is it quite as pretty as pulling a bubbling, cheesy casserole out of the oven?

    No.

    Do I miss melted cheese?

    Of course I do.

    But it is one of those things I have mostly gotten used to giving up.

    The nice part about serving it separately is that everyone can eat the same dinner.

    I don’t need a special meal.

    The rest of the family doesn’t have to eat exactly the way I do.

    They can add cheese.

    I can skip it.

    Everybody wins.

    Our Low-Sodium Version

    Ingredients

    • 2 medium bell peppers, chopped
    • 1 medium onion, chopped
    • 2 tablespoons olive oil, divided
    • 1 teaspoon black pepper, divided
    • ½ teaspoon red pepper flakes, optional
    • 1 teaspoon garlic powder
    • 2 teaspoons chili powder
    • 1 teaspoon cumin
    • ½ teaspoon paprika
    • 4 cups cooked rice or quinoa
    • 1 can no-salt-added black beans, drained
    • 2–3 cups cooked shredded or chopped no-salt-added grilled chicken
    • 2 cans no-salt-added tomatoes
    • Shredded cheese, optional, served separately

    No added salt.

    How We Make It

    Heat 1 tablespoon of olive oil in a large pot or Dutch oven over medium heat.

    Add the onion and some of the black pepper. Cook for a few minutes until the onion starts to soften.

    Add the bell peppers, remaining pepper, red pepper flakes if using, and garlic powder.

    Cook until the peppers begin to soften.

    Add the remaining tablespoon of olive oil and the cooked rice or quinoa.

    Cook for a few minutes, stirring occasionally.

    Add the no-salt-added black beans, cooked chicken and no-salt-added tomatoes.

    Then add the chili powder, cumin and paprika.

    Stir everything together and cook until completely heated through.

    That’s it.

    Since we don’t put cheese over the top, there is no need for us to broil the casserole afterward.

    If other family members want cheese, they add it to their individual serving.

    How Much Sodium Did We Remove?

    The original recipe lists about 1,046 mg of sodium per serving, based on six servings.

    The first thing we eliminate is the 1½ teaspoons of added salt.

    A teaspoon of table salt contains roughly 2,300 mg of sodium, so removing 1½ teaspoons eliminates about 3,450 mg of sodium from the entire dish.

    Then we replace regular canned beans with no-salt-added beans.

    We replace regular canned tomatoes with no-salt-added tomatoes.

    And I leave the cheese off my serving.

    At that point, most of the remaining sodium is coming naturally from ingredients such as the chicken and vegetables, plus whatever small amounts may naturally occur in the other ingredients.

    The exact sodium will depend on the brands you use and how your chicken was prepared, so always check your own labels.

    But compared with the original version, this is a dramatically different meal.

    This Makes a Lot of Food

    One warning.

    This recipe makes a lot.

    The original recipe is listed as six servings, and I believe it.

    My problem is that I tend to overeat every time we make it.

    It’s one of those meals where you finish your bowl and think:

    Maybe just a little more.

    Then a little more turns into another serving.

    So apparently my biggest problem with this casserole is no longer sodium.

    It’s portion control.

    I’ll take that problem.

    Why I Like Recipes Like This

    This is exactly the type of low-sodium cooking that works for me.

    I don’t want every meal to feel like something was taken away.

    I would rather start with a recipe we already enjoy and figure out where the sodium is coming from.

    Sometimes the solution is surprisingly simple.

    Remove the salt.

    Buy the no-salt-added version of canned ingredients.

    Put higher-sodium toppings on the side.

    Use spices for flavor.

    You don’t necessarily have to reinvent the entire meal.

    Sometimes you just need to change the parts that are causing the problem.

    And this one is staying in our regular rotation.

    Recipe Credit

    This recipe was adapted from the One Pot Mexican Rice Casserole by Luci’s Morsels. I modified the recipe to fit the way my family cooks and to significantly reduce the sodium.

    Medical & Nutrition Disclaimer

    This recipe reflects how I personally reduce sodium in meals as part of the dietary plan developed for my health needs. It is not medical or nutritional advice. Sodium needs vary depending on individual health conditions, medications and guidance from healthcare professionals. Nutrition values can also vary significantly based on ingredient brands, serving sizes and preparation methods. Always check product labels and follow the dietary recommendations provided by your own healthcare team.

  • Crispy Lower-Sodium Chicken Tenders

    Crispy Lower-Sodium Chicken Tenders

    Chicken tenders are one of those foods that don’t exactly scream low sodium.

    Between the seasoning, breading and whatever you’re dipping them into, sodium can add up pretty quickly.

    But this is another one of those recipes where I’ve found that a couple of really simple changes can make a big difference without ruining the food.

    The original recipe comes from Spend With Pennies:

    Crispy Oven-Baked Chicken Tenders – Spend With Pennies

    I make two main changes.

    Leave out the added salt and replace the cornflake crumbs with more Panko.

    That’s pretty much it.

    And they’re still crispy, flavorful and really good.

    Change #1: I Leave Out the Salt

    The original recipe uses both seasoned salt and regular salt in different parts of the breading and seasoning process. 

    I leave both out.

    There’s already paprika, garlic powder and black pepper in the recipe, so there’s plenty of flavor going on without the added salt.

    And if we want a little more kick?

    Cayenne pepper.

    We do that all the time.

    You don’t need much. Just enough to give the tenders a little heat.

    That’s something I’ve learned since dramatically reducing the sodium in my diet: taking away salt doesn’t mean taking away seasoning.

    There are plenty of other flavors to work with.

    Change #2: Goodbye Cornflakes, Hello Panko

    This is the other big change I make.

    The original recipe calls for 1 cup of cornflake crumbs and 1 cup of Panko breadcrumbs.

    Instead, I skip the cornflake crumbs completely and use additional Panko.

    The reason is simple:

    Sodium.

    The cornflake crumbs I’ve looked at contain considerably more sodium than the Panko I use. That’s one of those places where reading the nutrition label really pays off.

    With the products I buy, the Panko is only around 25–35 mg of sodium per cup, while the cornflake crumbs I compared were around 250 mg for just 6 tablespoons.

    Brands vary, so definitely check the package you’re actually buying.

    But for me?

    Panko wins.

    And here’s the best part:

    I don’t feel like I’m sacrificing the crunch.

    In fact, the original Spend With Pennies recipe specifically lists doubling up on Panko as an alternative if you don’t use cornflakes. 

    So I simply use 2 cups of Panko instead of 1 cup Panko + 1 cup cornflake crumbs.

    Easy.

    Still Plenty of Crunch

    This was important to me.

    I don’t want a “healthy chicken tender” that’s basically a sad piece of chicken with some wet breadcrumbs hanging off it.

    I want crunch.

    And the Panko does the job.

    The paprika, garlic powder and black pepper give the coating flavor. Add some cayenne if you want some heat.

    The result is still a crispy chicken tender—just without the added salt and higher-sodium cornflake coating I don’t need.

    Oven or Air Fryer?

    We make these both ways.

    Sometimes they go into the oven.

    Our oven actually has an air-fryer setting, which works pretty well when we’re making a larger batch.

    But if I’m choosing purely based on the finished chicken?

    The countertop air fryer wins.

    I think it does a better job of getting them crispy.

    The downside is capacity.

    I can fit a lot more chicken in the oven than I can in the air-fryer appliance, so which one we use usually depends on how much we’re making.

    The original recipe calls for baking at 425°F for about 18–22 minutes. It also provides an air-fryer option of 350°F for about 10–12 minutes, cooking the tenders in a single layer. Chicken should reach a safe internal temperature of 165°F

    The Air Fryer Really Wins the Next Day

    There’s one place where I don’t even think it’s a contest.

    Leftovers.

    Chicken tenders reheated in the microwave?

    Eh.

    They’ll get hot.

    But crispy?

    Not so much.

    Put them back in the air fryer and they come back to life.

    The original recipe also recommends the air fryer or oven for reheating if you want to preserve the crunch. 

    It’s one of my favorite uses for the air fryer.

    And We Already Have the Dipping Sauce

    Remember the Homemade Low-Sodium Arby’s-Style Sauce we made?

    This is exactly the kind of thing I make it for.

    Crispy chicken tender.

    Little bit of that sweet and tangy sauce.

    Done.

    And because I modified the sauce too, I’m not taking all the sodium I removed from the chicken and dumping it right back onto the plate through the dipping sauce.

    That would kind of defeat the purpose.

    How Much Sodium Does This Save?

    The original Spend With Pennies recipe currently lists 865 mg of sodium per serving, although the site correctly notes that nutrition information is an estimate and varies depending on ingredients and brands. 

    I’m not going to claim an exact sodium number for my version without calculating every specific brand and the amount of breading that actually ends up on the chicken.

    But we’re removing two significant sources:

    No added salt or seasoned salt.

    No cornflake crumbs.

    Then we’re replacing those cornflake crumbs with the much lower-sodium Panko that I buy.

    That makes this a significantly lower-sodium alternative based on the ingredients I use, while still giving me the chicken tenders I actually want to eat.

    And as always…

    Lower sodium doesn’t mean I should eat the entire tray.

    Although with these, I’ll admit that’s easier said than done.

    ❤️ Greg’s Take

    This is exactly the kind of recipe modification I love.

    I’m not making some completely different meal and pretending it’s a chicken tender.

    It’s still a chicken tender.

    It’s crispy.

    It’s seasoned.

    I can add cayenne when I want some heat.

    I can throw the leftovers in the air fryer the next day and crisp them right back up.

    And I’ve eliminated ingredients that were adding sodium without giving me anything I couldn’t get another way.

    That’s really becoming my approach to low-sodium cooking:

    Don’t automatically give up the food.

    Look at the recipe.

    Look at the labels.

    Figure out where the sodium is coming from.

    And then ask:

    Can I change that ingredient without ruining what I actually like about the food?

    In this case?

    Absolutely.

    Panko for the crunch. Spices for the flavor. No added salt needed.


    Original Recipe

    This recipe is my lower-sodium adaptation of the Baked Chicken Tenders recipe by Holly Nilsson at Spend With Pennies. For the original ingredients and complete preparation instructions:

    View the original Baked Chicken Tenders recipe at Spend With Pennies

    Medical & Nutrition Disclaimer

    This article describes how I personally modify recipes to reduce sodium in my diet. It is not medical or nutritional advice. Sodium content varies considerably between brands, so always check the nutrition labels on the ingredients you actually use. Follow any dietary recommendations provided by your own healthcare team.

  • Homemade Low-Sodium Arby’s-Style Sauce

    Homemade Low-Sodium Arby’s-Style Sauce

    There are certain condiments I really missed when I started seriously restricting sodium.

    This is one of them.

    I love Arby’s Sauce. It’s sweet, tangy, a little spicy, and it’s one of those sauces I’ll put on all kinds of food.

    The problem?

    Like so many condiments, sodium can add up quickly.

    Fortunately, I found a homemade Arby’s-style sauce recipe from WonkyWonderful and realized it would be incredibly easy to modify for the way I eat now.

    A couple of ingredient swaps, leave out the added salt, and about 20 minutes later…

    Bam. Sauce is back.

    First Thing to Go: The Salt

    This one’s easy.

    The original recipe calls for sea salt.

    I leave it out completely.

    There are already plenty of flavorful ingredients in this sauce, so I don’t think it needs it.

    That’s something I’ve discovered over and over since I started cooking with much less sodium.

    Salt isn’t always necessary just because it’s printed in the recipe.

    Sometimes you can leave it out and barely notice.

    For me, this is one of those times.

    The Big Change: No-Salt-Added Ketchup

    Ketchup is the base of the sauce, so this is where I can make a huge difference.

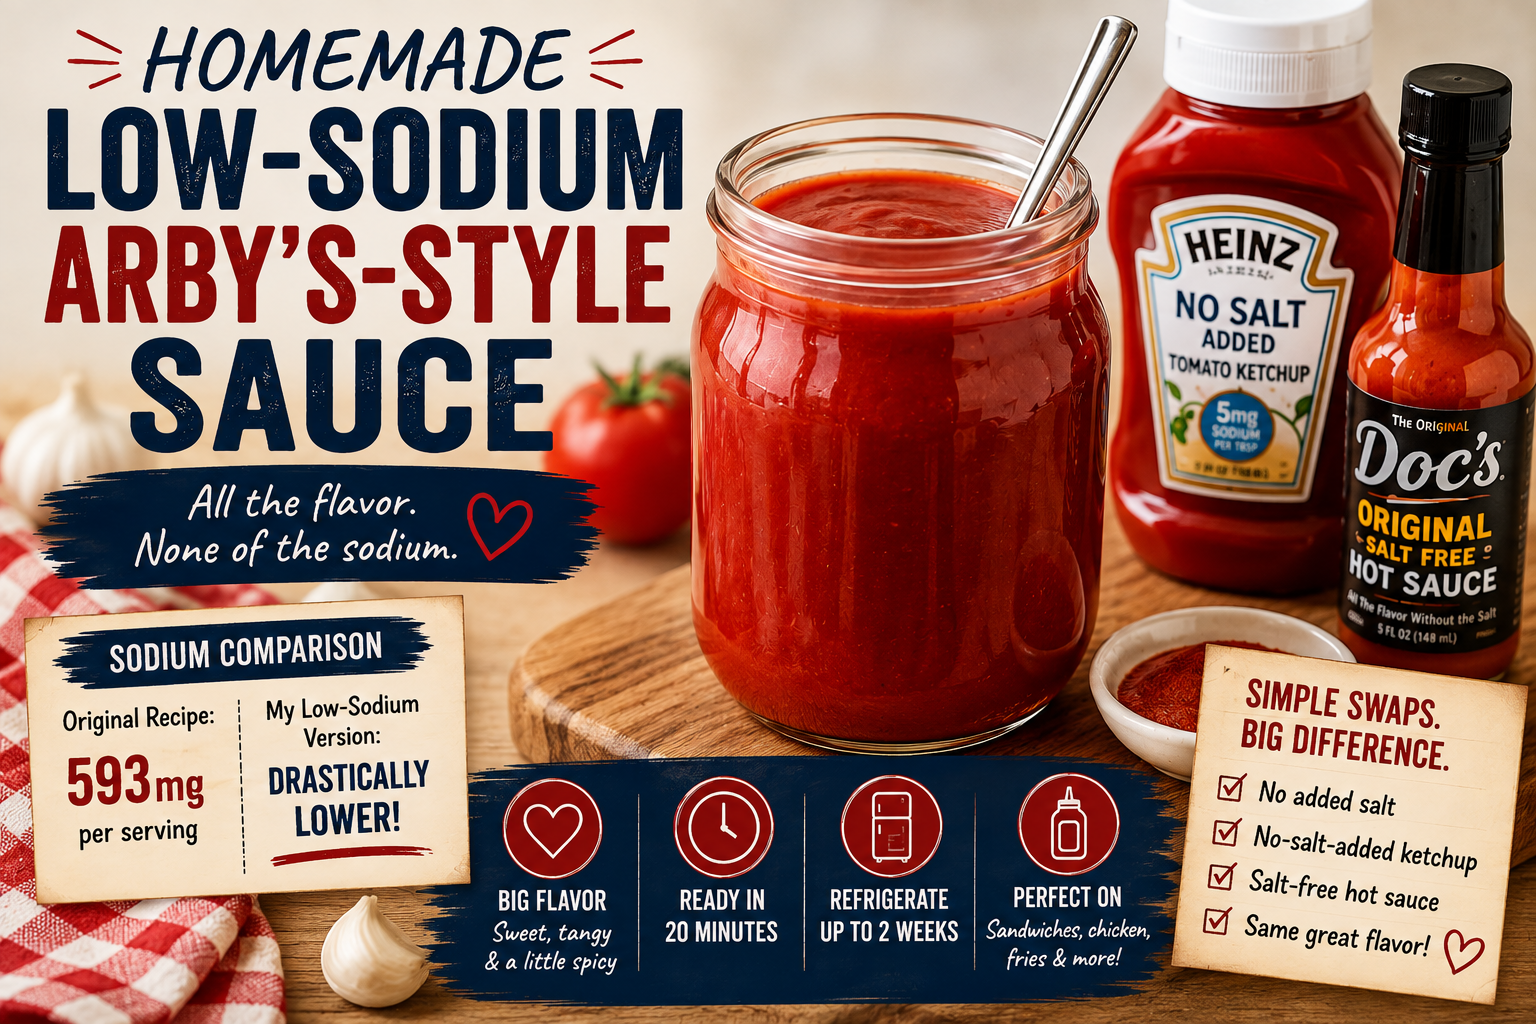
    Instead of regular ketchup, I use Heinz No Salt Added Ketchup.

    This stuff is kind of interesting.

    Regular Heinz ketchup contains 180 mg of sodium per serving, while the no-salt-added version has only 5 mg. That’s 96% less sodium. 

    By itself?

    I’ll be honest.

    It’s pretty bland.

    If I squirt some on a burger and expect regular ketchup, I’m probably going to be disappointed.

    But that’s not what I’m doing here.

    Once you combine it with all the other ingredients in this recipe, that bland ketchup becomes a completely different animal.

    That’s where it really works for me.

    Then I Replace the Hot Sauce

    The other substitution I make is the hot sauce.

    A lot of traditional hot sauces can bring more sodium into a recipe, so I use Doc’s Original Salt-Free Hot Sauce.

    Doc’s Original Salt-Free Hot Sauce

    Doc’s describes its original hot sauce as sodium-free, which makes it a great option for this recipe. 

    This product was actually a pretty big find for me.

    Hot sauce was another condiment I thought might disappear from my life once I started watching sodium so closely.

    Then I found this.

    Hot sauce was back.

    I’ll eventually add Doc’s Salt-Free Hot Sauce as its own Helpful Find because I’ve found plenty of uses for it besides this recipe.

    Everything Else Stays Pretty Much the Same

    After those changes, I follow the original recipe.

    That’s what I like about this one.

    I’m not trying to invent some complicated replacement sauce with 47 ingredients that takes half a day to make.

    Remove the salt.

    Swap the ketchup.

    Swap the hot sauce.

    Follow the rest of the directions.

    About 20 minutes later…

    I’ve got sauce.

    That’s my kind of recipe.

    How Much Sodium Did We Actually Remove?

    This is where things get interesting.

    The original recipe’s nutrition information lists 593 mg of sodium per serving.

    By removing the added salt and replacing two major sodium sources with extremely low- or no-sodium alternatives, we’re eliminating a substantial amount of sodium from the recipe.

    The Heinz ketchup I use has only 5 mg of sodium per serving, compared with 180 mg in regular Heinz ketchup. 

    And the Doc’s hot sauce is marketed as sodium-free

    So my version is dramatically lower in sodium than making it with the regular ingredients.

    But compared with where we started?

    It’s not even close.

    Don’t Read That as “Drink the Bottle”

    You knew this was coming.

    Just because we’ve taken a huge amount of sodium out of something doesn’t mean:

    Congratulations! The entire bottle is now one serving.

    No.

    We’ve talked about this.

    I still use it as a condiment.

    The difference is that now I can enjoy a flavorful sauce without having one little squirt consume a ridiculous portion of what I’m trying to manage for the day.

    That’s the goal.

    Not unlimited food.

    Better choices.

    Into the Bottle It Goes

    Once the sauce has finished cooking and cooled, I transfer it into condiment bottles and keep it in the refrigerator.

    I use bottles like these:

    Get these on Amazon

    It makes the homemade sauce just as convenient as something I’d buy at the grocery store.

    Open the refrigerator.

    Grab the bottle.

    Squirt.

    Put it back.

    The original recipe recommends keeping the sauce refrigerated and using it within about two weeks.

    That’s never really been a problem around here.

    It doesn’t last two weeks.

    Not because it goes bad.

    Because we eat it.

    What Do I Put It On?

    Probably a better question is:

    What don’t I put it on?

    It’s great anywhere you want a sweet, tangy barbecue-style sauce.

    I’ve used it with sandwiches, chicken and other meals where I would have previously reached for a bottled condiment.

    And that’s really why I like recipes like this.

    It’s not just about making “diet food.”

    I don’t want every meal to remind me that I’m eating differently because of my health.

    Sometimes I just want some freaking sauce.

    Now I can have it.

    ❤️ Greg’s Take

    This recipe represents something I’ve learned about low-sodium cooking:

    Before eliminating a food completely, see if you can fix it.

    The original recipe wasn’t going to work particularly well for the way I eat.

    So I changed three things.

    No sea salt.

    No-salt-added ketchup.

    Salt-free hot sauce.

    That’s it.

    I didn’t sacrifice all the flavor.

    I didn’t create some bizarre substitute that tastes nothing like the thing I wanted.

    I just changed the ingredients that were creating the sodium problem.

    And 20 minutes later, I have one of my favorite condiments sitting in my refrigerator again.

    That’s a win.

    Low sodium doesn’t have to mean no sauce.


    Original Recipe

    My version is adapted from the Arby’s Sauce Recipe by WonkyWonderful. You can find the original recipe and complete preparation instructions here:

    Original Arby’s Sauce Recipe – WonkyWonderful

    I modify the original recipe by omitting the added sea salt and substituting no-salt-added ketchup and salt-free hot sauce.

    Products I Use

    Heinz No Salt Added Ketchup:
    View at Amazon

    Doc’s Original Salt-Free Hot Sauce:
    View at Doc’s Salt Free

    Storage Bottles:
    View at Amazon


    Affiliate Disclosure

    This article contains an Amazon affiliate link. If you purchase something through that link, I may earn a small commission at no additional cost to you. I only share products that I personally use or believe are useful. Purchasing through my affiliate links helps support He’s Knocking on My Door and allows me to continue creating content.

    Medical Disclaimer

    This article describes how I personally modify recipes to reduce sodium in my diet. It is not medical or nutritional advice. Sodium needs and dietary restrictions vary from person to person. Always check the nutrition labels on the specific ingredients you use, since formulations can change, and follow the dietary recommendations provided by your healthcare team.

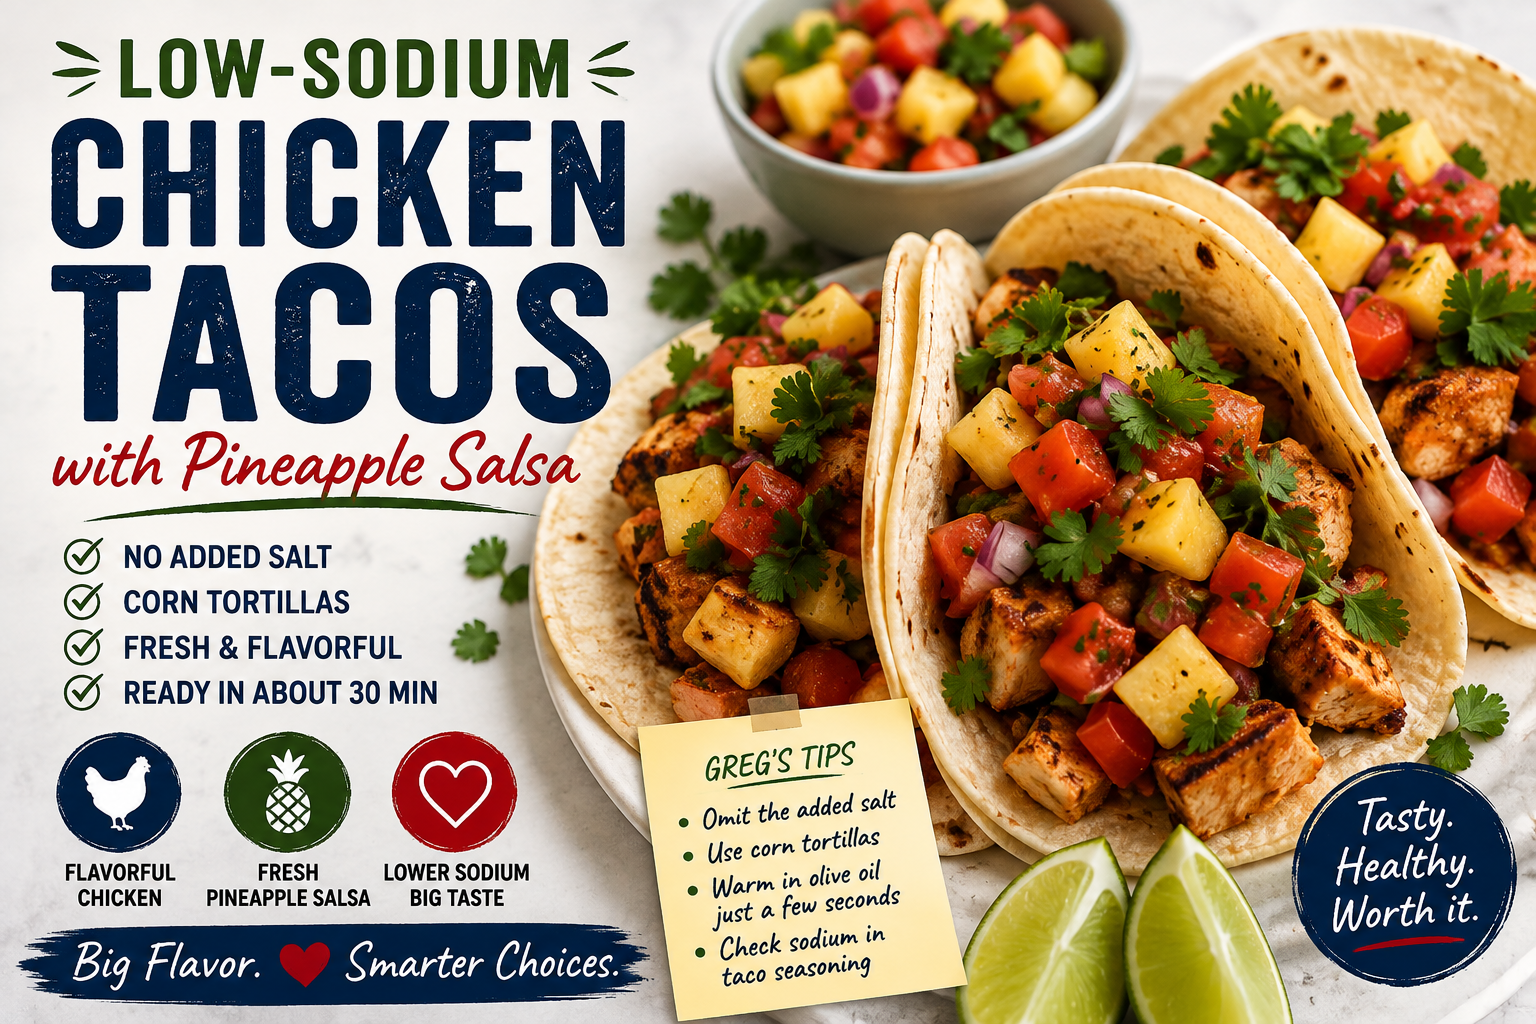
  • Low-Sodium Chicken Tacos with Pineapple Salsa

    Low-Sodium Chicken Tacos with Pineapple Salsa

    These tacos are dangerously good.

    And by dangerously good, I mean I used to have a serious problem understanding when taco night was supposed to end.

    I’ve gotten much better about portion control since then.

    The original recipe comes from Jessica Gavin’s Chicken Tacos with Pineapple Salsa, and it’s one we’ve made many times. It combines seasoned chicken with fresh pineapple salsa and warm tortillas, and the whole recipe can come together pretty quickly. 

    View the Original Chicken Tacos with Pineapple Salsa Recipe

    I’ve made a few changes over time to reduce the sodium and make the recipe a little easier for us to prepare.

    The First Thing I Do: Leave Out the Salt

    The original chicken marinade calls for ¾ teaspoon of kosher salt along with lime, honey, cumin, chili powder, paprika, onion powder, garlic powder, black pepper, oregano and optional cayenne. 

    I simply leave the salt out.

    All of it.

    There’s already so much flavor coming from everything else that I don’t think these tacos need the added salt.

    The lime brings acidity. The cumin, chili powder and paprika bring plenty of flavor. Then there’s garlic, onion, oregano, black pepper and a little cayenne if you want some heat.

    I don’t miss the salt.

    That’s something I’ve learned since changing the way I cook. Sometimes salt is doing most of the work in a recipe.

    Other times?

    It’s just along for the ride.

    This is one of those recipes where I think it can stay home.

    My Shortcut for Preparing the Chicken

    The original recipe calls for slicing chicken breasts into thinner cutlets and pounding them to an even thickness before marinating them. This helps the chicken cook evenly. 

    When I’m in a hurry, I’ll sometimes buy chicken tenderloins instead.

    That saves me from having to slice a large chicken breast into cutlets. I put the tenderloins between plastic or inside a resealable bag and use a meat tenderizer to flatten them.

    It’s a simple shortcut that saves me some work.

    And yes, I have a meat tenderizer specifically for this.

    I use it for this recipe and anytime I need to get chicken to a relatively even thickness.

    Just remember: I’m trying to flatten the chicken.

    I’m not trying to punish it for something it did.

    Let the Marinade Do Its Thing

    Once the chicken is flattened, it goes into the marinade.

    The original recipe recommends marinating it for at least 20 minutes, with the option of preparing it farther in advance. 

    The only significant change I make to that marinade is leaving out the added salt.

    Then I cook the chicken until it reaches a safe internal temperature of 165°F, let it rest and cut it into pieces for the tacos. 

    Don’t Forget the Pineapple Salsa

    The pineapple salsa is one of the best parts.

    The original combines pineapple, tomato, red onion, jalapeño, lime and cilantro. 

    You get sweet from the pineapple, some heat from the jalapeño, acidity from the lime and freshness from everything else.

    Pile that on top of the seasoned chicken and you really don’t need salt to make these tacos interesting.

    There’s already plenty happening.

    Watch the Tortillas

    This is another place where I’ve learned to read the nutrition label.

    I use corn tortillas rather than flour tortillas.

    Some flour tortillas can contain a surprising amount of sodium depending on the brand, variety and size. I’ve personally found some around 400 mg of sodium per tortilla.

    That’s a lot when you consider that you’re probably not eating just one taco.

    So don’t assume tortillas are low in sodium simply because they don’t taste salty.

    Turn the package over and read the label.

    These are the corn tortillas I currently use:

    See the Corn Tortillas I Buy at Walmart

    I still check the nutrition information when I buy them because recipes and nutrition information can change.

    A Few Seconds in the Pan

    I like my tortillas warmed in a skillet with a little olive oil.

    They don’t need much.

    The original recipe recommends warming the tortillas for only about 10–15 seconds per side

    That’s about what I do.

    A few seconds on one side.

    Flip.

    A few seconds on the other.

    Done.

    Don’t walk away and start checking Facebook.

    We’re talking seconds here, not minutes.

    Then Into the Tortilla Warmer

    Once I’ve warmed the tortillas, I don’t want the first ones getting cold while I’m finishing the rest.

    That’s where another little kitchen gadget comes in handy:

    our tortilla warmer.

    I put the warmed tortillas inside, close it up and keep them there until we’re ready to assemble the tacos.

    It’s certainly not something you need to make this recipe.

    But it’s one of those inexpensive kitchen tools that makes taco night a little easier, especially when you’re preparing several tortillas at once.

    Warm chicken.

    Fresh pineapple salsa.

    Warm tortillas.

    Now we’re ready.

    Be Careful With the Taco-Seasoning Shortcut

    The original recipe also suggests using taco seasoning as an alternative when you’re short on time. 

    That’s certainly an option.

    But if you’re watching your sodium, check the package first.

    Taco seasoning is another place where sodium can sneak into a meal quickly, and the amount can vary substantially between products.

    Don’t assume.

    Read the serving size.

    Read the sodium.

    And pay attention to how much seasoning you’re actually using.

    You could also make your own salt-free taco seasoning and control exactly what goes into it.

    That’s probably another recipe I need to add to the site.

    And Then There’s Portion Control…

    Remember when I said these tacos are dangerously good?

    I wasn’t kidding.

    I used to eat a lot of them.

    I’ve gotten much better about that.

    One of the biggest lessons I’ve learned is that making something lower in sodium doesn’t magically turn it into an unlimited food.

    There are still tortillas.

    There are still carbohydrates.

    There are still calories.

    And there’s still the small problem that I could probably keep eating these until somebody physically removes the plate from the table.

    So now I pay attention to how many I’m eating.

    Low sodium doesn’t mean unlimited.

    Funny how that article keeps finding its way into my recipes.

    ❤️ Greg’s Take

    This is exactly the kind of recipe that convinced me low-sodium food doesn’t have to taste like punishment.

    I didn’t completely reinvent it.

    I didn’t replace fifteen ingredients.

    I made a few simple changes.

    Leave out the ¾ teaspoon of salt.

    Choose a lower-sodium corn tortilla.

    Pay attention to the sodium if you’re using packaged taco seasoning.

    That’s basically it.

    The chicken still has lime, cumin, chili powder, paprika, garlic, onion, oregano and cayenne.

    Then you pile fresh pineapple salsa on top.

    There’s plenty happening in that taco.

    And I’ve found a few ways to make preparing them easier too. Chicken tenderloins and my meat tenderizer save me some prep work, and the tortilla warmer keeps everything warm while I finish cooking.

    Quick, flavorful and something I actually look forward to eating.

    The only thing I haven’t found a good kitchen gadget for is self-control.

    I’m still looking for that one on Amazon.


    Recipe Credit

    This is my lower-sodium adaptation of Jessica Gavin’s Chicken Tacos with Pineapple Salsa. Her original recipe, complete ingredient measurements and preparation instructions are available on her website. 

    View the Original Recipe at Jessica Gavin

    I omit the added salt, use the corn tortillas I prefer and make a few preparation changes based on how we cook the recipe at home.


    Affiliate Disclosure

    This article contains Amazon affiliate links. If you purchase something through one of these links, I may earn a small commission at no additional cost to you. I personally use the products I’ve linked in this article and am sharing them because they’ve been useful in my own kitchen. Purchasing through my links helps support He’s Knocking on My Door and allows me to continue creating content.

    Medical Disclaimer

    This article describes how I personally modify recipes to fit the way I eat. It is not medical or nutritional advice. Individual dietary needs vary, particularly for people managing conditions that affect sodium, carbohydrates, potassium or other nutrients. Always check the nutrition labels on the specific ingredients you use and follow the dietary guidance provided by your healthcare team.

  • Easy Low-Sodium Yellow Rice in the Rice Cooker

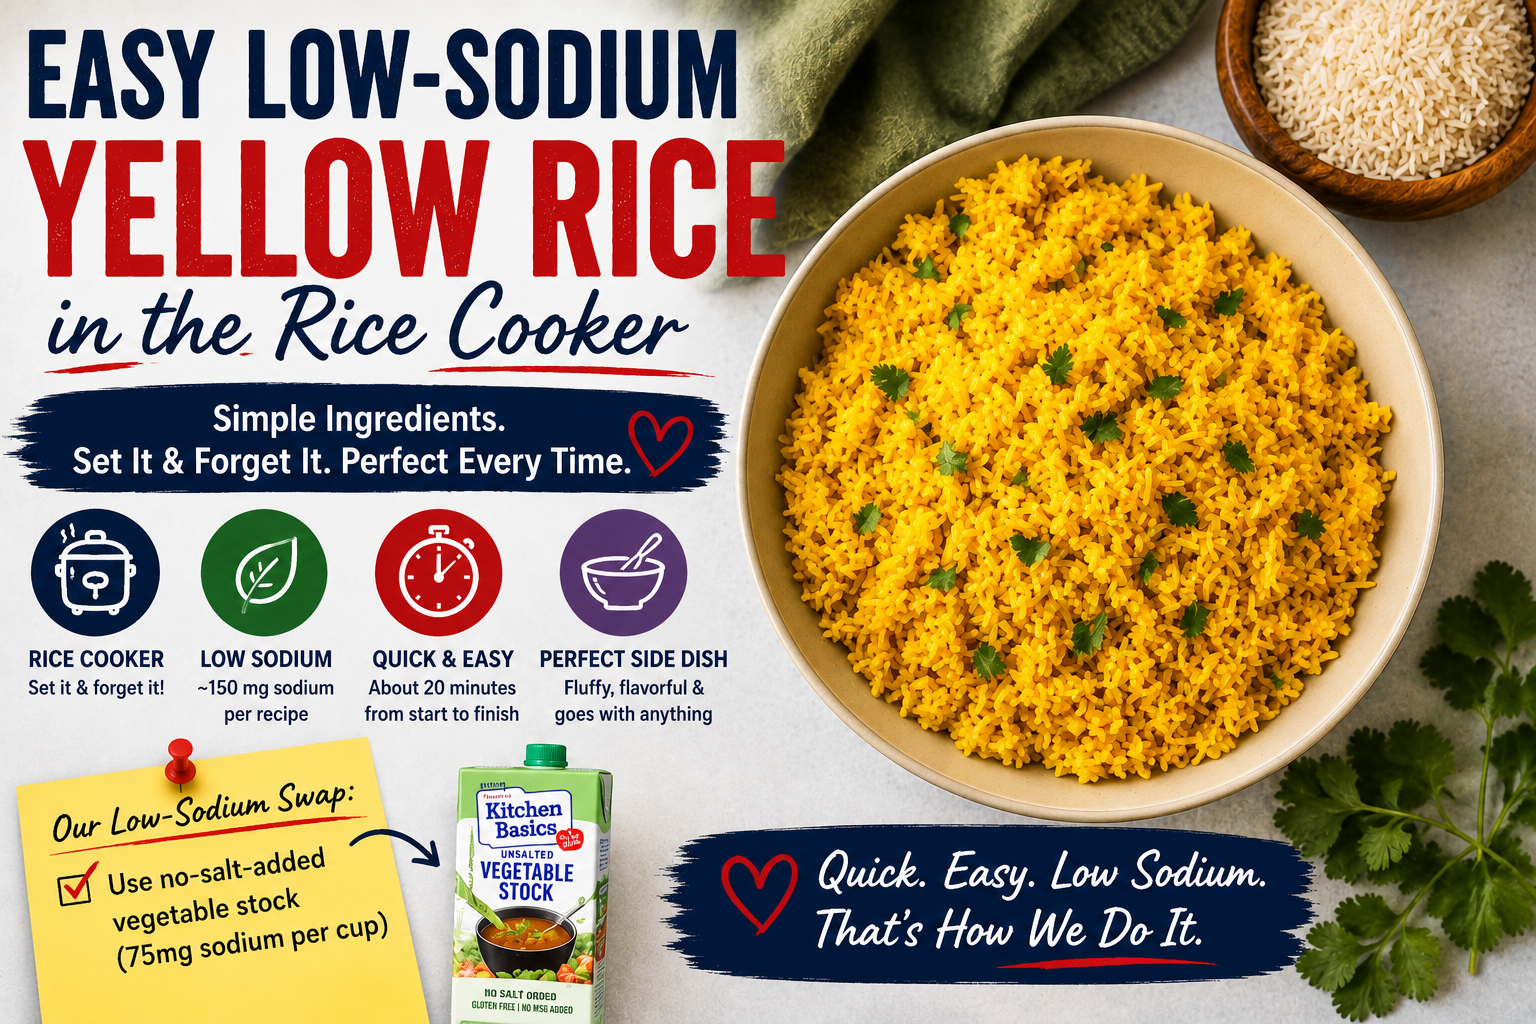
    Easy Low-Sodium Yellow Rice in the Rice Cooker

    This has become one of our favorite easy side dishes.

    We originally found this Yellow Rice in a Rice Cooker recipe from I Heart Vegetables, and it’s good, simple and incredibly easy to make.

    Original Yellow Rice Recipe from I Heart Vegetables

    And when I say easy, I mean easy.

    Rinse the rice, put everything in the rice cooker, push the button and basically forget about it.

    About 20 minutes later, you have a flavorful yellow rice that works as a side dish or as the base for a meal. The original recipe lists about 5 minutes of prep and 15 minutes of cooking time. 

    How We Make It Lower in Sodium

    The original recipe uses vegetable broth and mentions Better Than Bouillon vegetable base as the author’s choice. 

    That’s where we make our biggest change.

    Instead, we use Kitchen Basics Unsalted Vegetable Stock. Walmart currently lists it as having no added salt. 

    Kitchen Basics Unsalted Vegetable Stock at Walmart

    The carton we use lists 75 mg of sodium per cup. Since the recipe requires two cups, that’s about:

    75 mg × 2 cups = 150 mg of sodium

    That’s roughly 150 mg of sodium from the stock in the entire batch of rice, not per serving.

    We also leave out the additional salt called for in the original recipe.

    Of course, the exact sodium in your finished rice depends on the specific brands and ingredients you use, so always check your own labels.

    Our Version

    For our lower-sodium version, we use:

    • 1 cup white rice
    • 2 cups no-salt-added vegetable stock
    • 1 teaspoon ground turmeric
    • 1/2 teaspoon onion powder
    • 1/2 teaspoon garlic powder
    • We omit the salt

    The ingredient proportions, other than our stock substitution and omission of added salt, come from the original I Heart Vegetables recipe. 

    I rinse the rice, put everything into the rice cooker, give it a stir and start the normal white-rice cycle.

    That’s about it.

    When it’s finished, fluff it with a fork and serve.

    Quick. Easy. And very little cleanup.

    This Is Why I Love the Rice Cooker

    This recipe is a perfect example of why we bought our rice cooker in the first place.

    There’s no standing over the stove watching a pot.

    There’s no wondering whether the rice is done.

    I put everything in, start it and move on to whatever else we’re making.

    The rice cooker handles the rest.

    And the rice comes out consistently good.

    Why We Finally Bought a Rice Cooker

    Don’t Forget About Serving Size

    Here’s where I’m going to sound like a broken record.

    Just because I reduced the sodium doesn’t mean I should sit down and eat the entire rice cooker.

    Low sodium doesn’t mean unlimited.

    Rice still contains carbohydrates, so portion size matters to me for reasons beyond sodium.

    It’s also exactly why I wrote my article about reading nutrition labels.

    You can’t look at one number on a label and decide whether something works for you. You have to consider the serving size and the amount you’re actually going to eat.

    ❤️ Greg’s Take

    This is exactly the kind of recipe I’ve been looking for since changing the way I eat.

    I don’t necessarily need to reinvent every recipe.

    Sometimes I just need to find the ingredient that’s causing me trouble and replace it with something that works better for me.

    In this case, swapping the vegetable bouillon/broth for an unsalted vegetable stock and skipping the additional salt gives us a version that fits much better into the way we’re eating now.

    And I don’t feel like I’m eating bland “diet food.”

    It’s yellow rice.

    It’s flavorful.

    It goes with a ton of different meals.

    And the rice cooker does almost all the work.

    Drop it in. Push the button. Go make the rest of dinner.

    That’s my kind of recipe.


    Recipe Credit

    This recipe is adapted from I Heart Vegetables — How to Make Yellow Rice in a Rice Cooker. I use their recipe as the starting point and modify it to reduce the sodium by using unsalted vegetable stock and omitting the added salt.

    View the Original Recipe at I Heart Vegetables

    Disclaimer: This article reflects my personal experience with low-sodium cooking and the modifications I make to recipes while living with chronic illness. It is not medical or nutritional advice. Sodium needs can vary from person to person, so always check ingredient labels and follow the guidance of your own doctor, dietitian, or healthcare team. Product ingredients and nutrition information can also change over time.

  • Blackened Mahi Mahi: Bringing One of My Favorite Foods Back

    Blackened Mahi Mahi: Bringing One of My Favorite Foods Back

    Sometimes a recipe is about more than what’s for dinner.

    For me, blackened mahi mahi is tied to a much bigger part of my story.

    After my stroke in 2020, my doctors gave me a long list of lifestyle changes to consider. Some were fairly simple, like switching to an electric razor because I was taking blood thinners and needed to reduce the chance of cutting myself.

    Others involved bigger changes—eating healthier, exercising, losing weight, and being more careful about injuries and falls.

    At the time, I was probably in the worst physical shape of my life. I was driving an hour and a half each way to and from work, spending far too much time sitting, and not taking particularly good care of myself.

    To make matters worse, my stroke recovery happened during a Midwestern winter.

    Because I was taking a blood thinner, my doctors were understandably concerned about what could happen if I slipped on the ice and hit my head. One suggestion was that I wear a bicycle helmet when I went outside.

    At first, I thought they meant during the early part of my recovery.

    Nope.

    They meant going forward.

    I understood the reasoning. A fall and head injury while taking a blood thinner can be serious.

    But I also knew myself.

    I wasn’t going to spend every Midwestern winter walking around outside wearing a bicycle helmet.

    Something had to change.

    Trading Midwest Winters for Southwest Florida

    After I recovered enough from the stroke, my wife and I made a major life decision.

    We were moving to Southwest Florida.

    It was a place we had vacationed and loved, and we decided it was where we wanted to live.

    There were plenty of reasons for the move, but I’ll admit that food was one of them.

    We love seafood.

    Fresh fish. Shrimp. Outdoor restaurants. Sitting near the water and enjoying a meal in the Florida sunshine.

    And one of our absolute favorites has always been blackened fish and blackened shrimp.

    Unfortunately, my health journey wasn’t finished with me yet.

    Several years after the stroke, congestive heart failure entered the picture, and eventually I found myself living on a very restrictive low-sodium diet.

    Suddenly, those blackened seafood dinners I loved became a thing of the past.

    Blackened Didn’t Have to Mean Gone

    Restaurant blackening seasoning is something I generally avoid now because I don’t have enough control over how the food is seasoned or how much sodium is in it.

    For a while, I thought blackened fish might simply become another food I’d have to give up.

    Then I started looking at the problem differently.

    Maybe I didn’t have to give up blackened fish. Maybe I just needed to change how I made it.

    That’s exactly what we did.

    I found a Blackened Mahi Mahi recipe from Valerie Brunmeier at Valerie’s Kitchen that we really enjoy. Her recipe uses mahi mahi cooked quickly in a hot skillet with butter and olive oil, then finished with fresh lemon juice. 

    Original Blackened Mahi Mahi Recipe at Valerie’s Kitchen

    But there’s one important change I make.

    My Low-Sodium Modification

    Valerie’s original recipe calls for a homemade Cajun seasoning mixture that includes salt. 

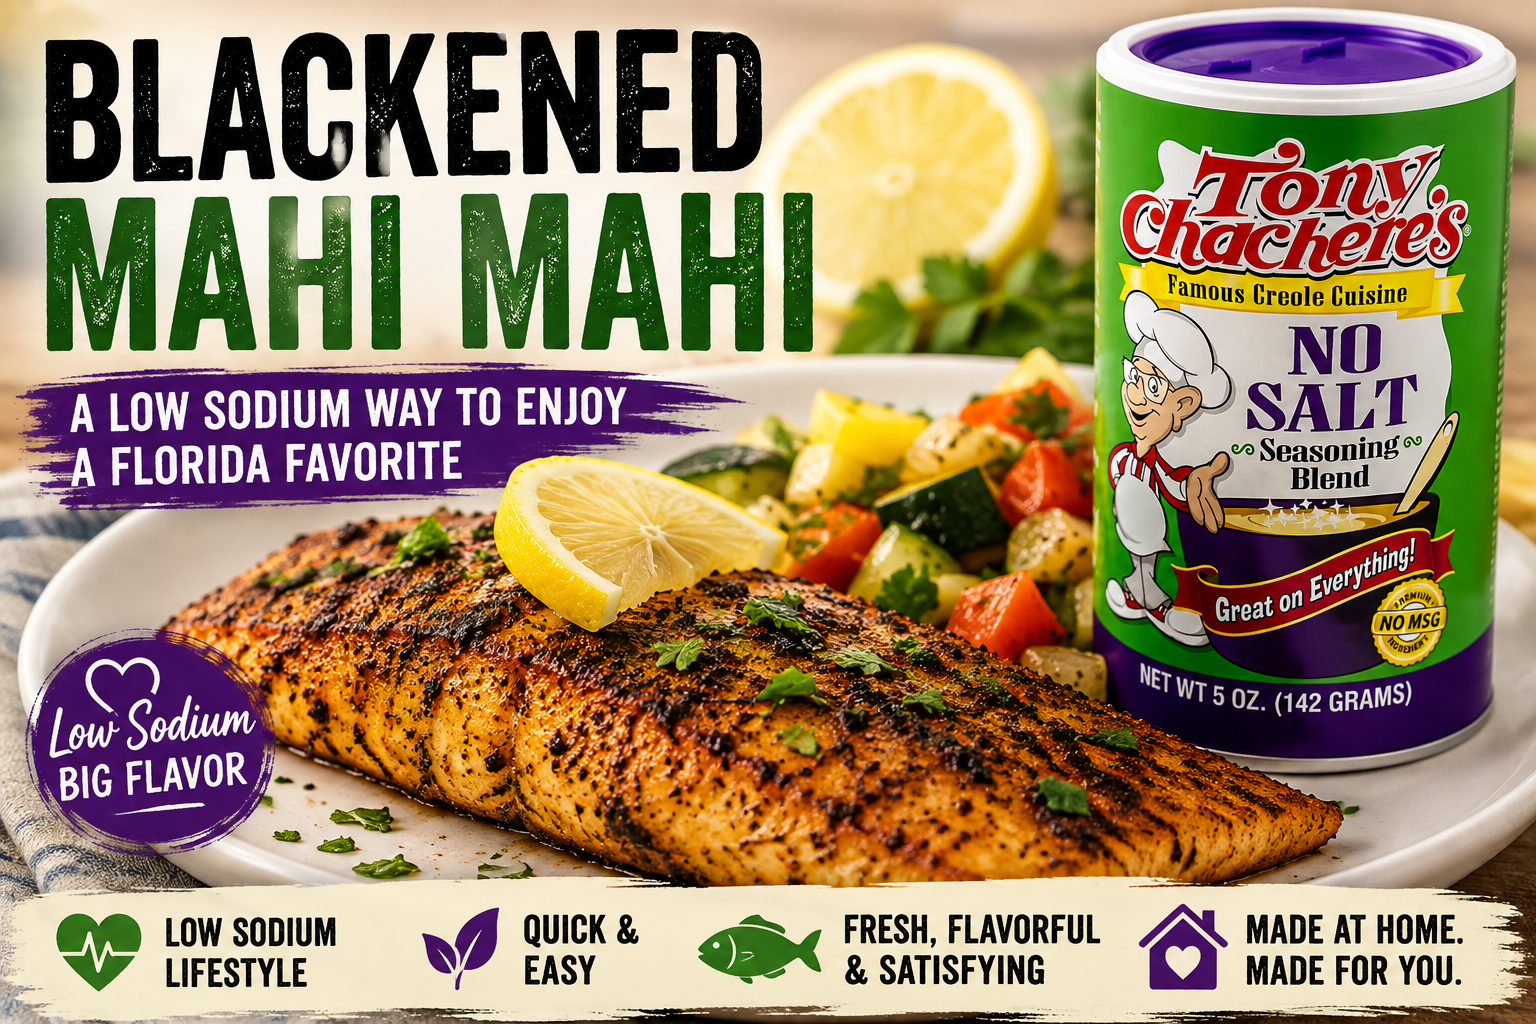
    Instead of making that seasoning mixture, I substitute Tony Chachere’s No Salt Seasoning Blend.

    That’s it.

    I still follow the basic cooking method from the original recipe, but replacing the blackening seasoning allows me to better control the sodium in the meal.

    I’ve already written about the seasoning and why it’s become one of my Helpful Finds:

    Tony Chachere’s No Salt Seasoning – My Helpful Find

    The original mahi mahi recipe is incredibly quick, too. Valerie lists about 10 minutes of preparation and 8 minutes of cooking time. The fish is seasoned, cooked in a hot skillet until golden and cooked through, and finished with fresh lemon. 

    It’s exactly the kind of meal I like: simple, fast and full of flavor.

    The Sodium Difference Matters to Me

    Here’s where making the meal at home really becomes important.

    The original recipe’s published nutrition information estimates 540 mg of sodium per serving, although Valerie notes that the nutrition calculation is only an estimate and actual values depend on the ingredients used. 

    By eliminating the salt-containing seasoning mixture and using my no-salt seasoning instead, I can remove a significant source of added sodium from the recipe.

    That doesn’t necessarily make the finished dish completely sodium-free—the fish, butter and other ingredients can contain naturally occurring or added sodium depending on what you buy—but it gives me much more control over the final meal.

    And control has become incredibly important to me.

    At a restaurant, I don’t know exactly what’s going onto that piece of fish.

    At home, I do.

    This Is What Low-Sodium Living Means to Me

    I’ve talked before about how frustrating a low-sodium diet can be.

    There are foods I simply don’t eat anymore.

    There are restaurants I don’t visit anymore.

    There are things I miss.

    But I’m also learning that before I put something permanently on the can’t-have-it-anymore list, it’s worth asking one question:

    Can I make it differently?

    That’s what happened with bread. Store-bought bread was difficult to fit into my sodium goals, so we bought a bread machine and started making our own.

    It’s what happened with spaghetti sauce.

    And now it’s what we’ve done with blackened seafood.

    I’m not pretending my version is identical to sitting at a waterfront restaurant in Southwest Florida and ordering a heavily seasoned piece of blackened mahi mahi.

    But I can sit at home, enjoy a piece of fish with the flavors I love, and know exactly what went into it.

    I’ll take that trade.

    ❤️ Greg’s Take

    My health has changed tremendously since that stroke in 2020.

    So has the way I live.

    And definitely the way I eat.

    But one thing I’m trying very hard not to do is look at every dietary restriction as another thing being taken away from me.

    Sometimes there’s another way.

    This blackened mahi mahi is a perfect example.

    I didn’t have to give up one of my favorite Florida meals. I just had to learn how to make it differently.

    And when you’re living with chronic illness, getting one of those little pieces of normal life back can mean an awful lot.


    Recipe Credit

    The original Blackened Mahi Mahi recipe was created by Valerie Brunmeier of Valerie’s Kitchen. I’m sharing my personal experience and the low-sodium substitution I use when making it at home. Please visit Valerie’s site for the complete ingredient list, measurements, and cooking instructions. 

    Get the Original Blackened Mahi Mahi Recipe

    Disclaimer: This article reflects my personal experience with low-sodium cooking and the modifications I make to recipes while living with chronic illness. It is not medical or nutritional advice. Sodium needs can vary from person to person, so always check ingredient labels and follow the guidance of your own doctor, dietitian, or healthcare team. Product ingredients and nutrition information can also change over time.

  • Homemade Low Sodium Focaccia

    Homemade Low Sodium Focaccia

    Greg’s Kitchen Rating

    ⭐⭐⭐⭐⭐ Taste

    ⭐⭐⭐☆☆ Difficulty

    ⭐⭐⭐⭐⭐ Would I Make It Again?

    ⭐⭐⭐⭐⭐ Family Approved

    ⭐⭐⭐⭐⭐ Freezer Friendly

    ⭐⭐⭐⭐⭐ Worth Buying a Bread Machine?

    This recipe completely changed how I think about bread. I honestly believed fresh bread was something I’d have to give up after being diagnosed with CHF. Buying a bread machine turned out to be one of the best investments we’ve made for our kitchen—and our health.

    Sometimes You Don’t Have to Give Up the Foods You Love

    One of the hardest things about switching to a low sodium lifestyle wasn’t giving up potato chips or fast food.

    It was bread.

    Bread has always been a part of our meals. Toast with breakfast. A sandwich for lunch. Fresh bread alongside pasta or soup. I never really thought much about it until I started reading nutrition labels after being diagnosed with congestive heart failure.

    That’s when I realized something surprising.

    Even ordinary sandwich bread can contain a significant amount of sodium in just a couple of slices. When you’re trying to stay within a daily sodium limit, those numbers add up quickly. 

    I wasn’t ready to give up bread.

    Instead, my wife and I decided to find another solution.

    We bought a bread machine.

    At first, I wasn’t sure if it would be worth it. Neither of us had much experience baking bread, and I honestly wondered if homemade bread could taste as good as what we were buying at the grocery store.

    It didn’t take long to find out.

    Not only did it taste better, but I finally had something I hadn’t had in a long time—control.

    I knew exactly what was going into every loaf.

    I could leave out the added salt.

    I could choose the ingredients.

    And for the first time since changing my diet, bread was back on the menu.

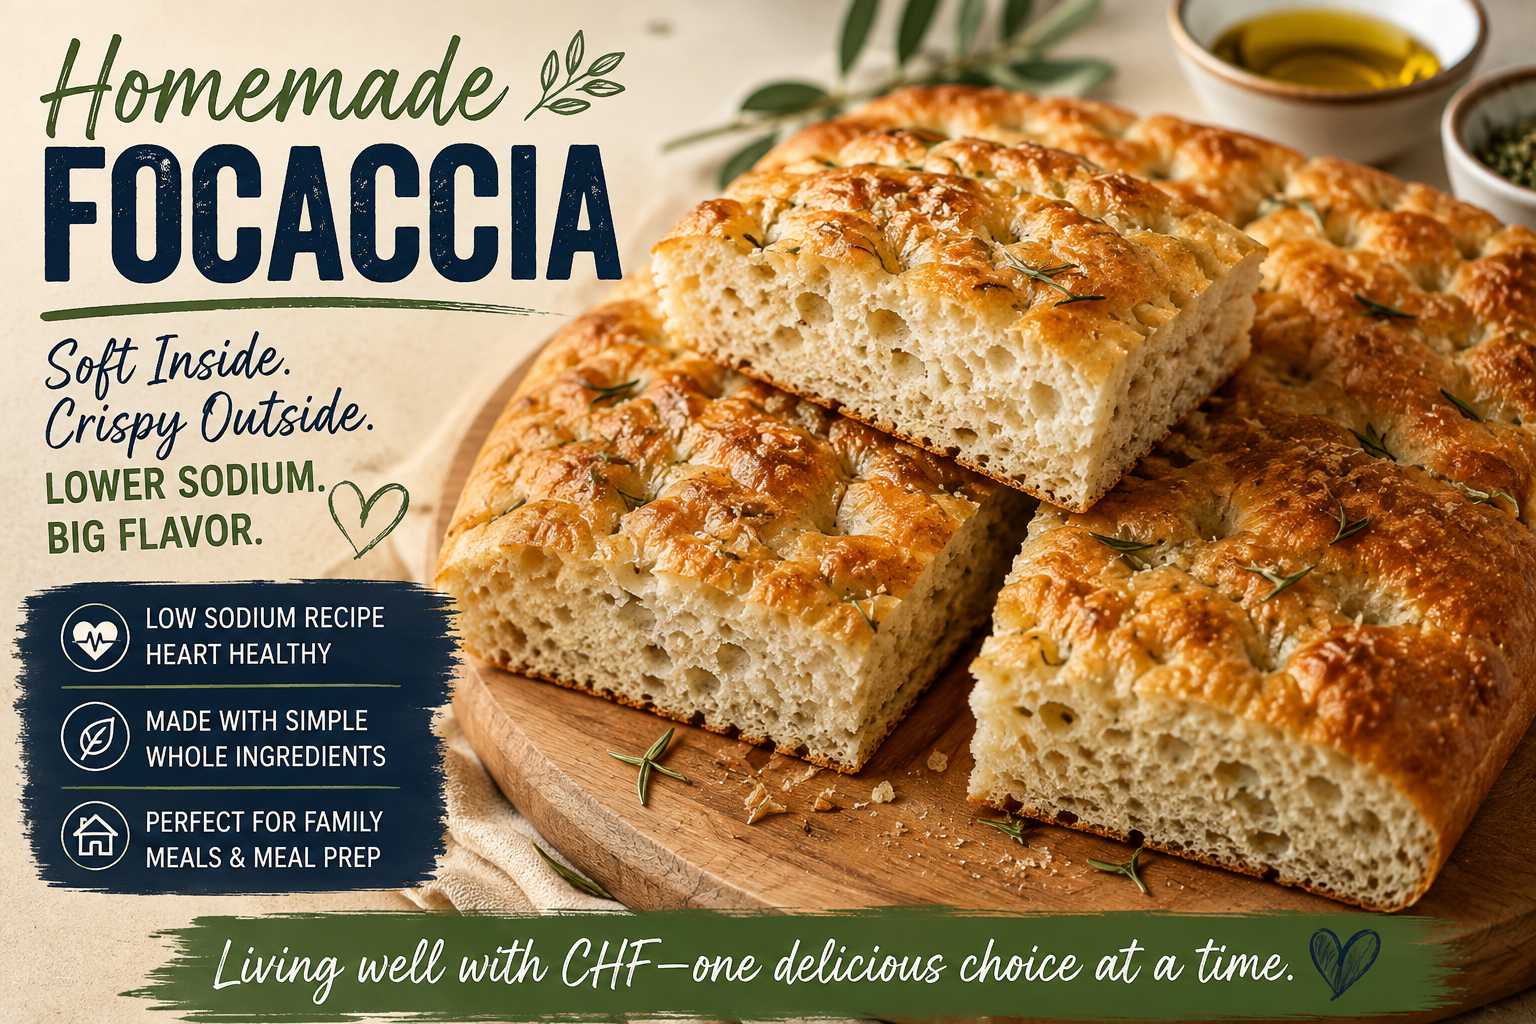
    One of the first recipes we tried was a No-Salt Focaccia recipe from Paula Rhodes at Salad in a Jar. What caught my attention was that the bread machine does all of the hard work—mixing, kneading, and the first rise—while the focaccia is finished in the oven to create a crisp crust and a soft, airy interior. 

    The recipe uses simple ingredients like bread flour, olive oil, honey, Italian seasoning, and yeast to build flavor naturally instead of relying on salt. The result is a focaccia that’s light, flavorful, and incredibly versatile. We’ve enjoyed it as a side with pasta, dipped in olive oil and herbs, and even sliced for sandwiches. 

    One thing I’ve learned throughout this journey is that living with chronic illness doesn’t always mean giving things up.

    Sometimes it simply means learning a different way to make them.

    Buying a bread machine wasn’t really about making bread.

    It was about taking back something I thought I had lost.

    Every loaf reminds me that a low sodium lifestyle doesn’t have to be about deprivation. With a little creativity—and sometimes a new kitchen gadget—you can still enjoy many of the foods you love.


    ❤️ Greg’s Tip

    If you’re thinking about buying a bread machine, don’t look at it as another appliance taking up space on your counter.

    Think of it as an investment in your health.

    For me, it opened the door to fresh, homemade bread with ingredients I could control. That peace of mind has been worth every penny.


    Recipe Credit

    This focaccia recipe was created by Paula Rhodes of Salad in a Jar. I’ve shared my experience because it has become one of my favorite homemade bread recipes for a low sodium lifestyle. If you’d like the complete recipe and detailed step-by-step instructions, you can find it here:

    No-Salt Focaccia (Bread Machine Dough + Oven Bake) by Paula Rhodes. 

    Chronic illness may change how I eat, but it doesn’t get to decide what I enjoy.

  • Low Sodium Spaghetti Sauce

    Low Sodium Spaghetti Sauce

    ⭐ Greg’s Kitchen Rating

    Taste: ⭐⭐⭐⭐⭐
    Difficulty: ⭐⭐☆☆☆
    Would I Make Again? Absolutely.
    Family Approved: Yes
    Freezer Friendly: Yes

    You Don’t Have to Give Up Spaghetti Night

    If you had told me a few years ago that one day I’d be paying more attention to the sodium in spaghetti sauce than the flavor, I probably would have laughed.

    Then congestive heart failure changed everything.

    Like so many people living with CHF, one of the first things I learned was how much sodium is hiding in everyday foods. One of the biggest surprises for me was spaghetti sauce. I picked up a few jars at the grocery store and started reading the nutrition labels.

    I couldn’t believe the numbers.

    Some sauces contained hundreds of milligrams of sodium in just a half-cup serving. By the time you added pasta, meat, garlic bread, and maybe a salad, one dinner could account for a huge portion of the sodium I was trying to avoid.

    That wasn’t going to work for me.

    But I also wasn’t ready to give up spaghetti.

    One of the things I’ve learned on this journey is that living with chronic illness doesn’t mean giving up the foods you love. It often means finding a better way to make them.

    After searching online, I came across an excellent Low Sodium Spaghetti Sauce recipe from Kelly Jensen at Low So Recipes. What caught my attention was how simple it was. Instead of depending on salt for flavor, it relies on ingredients like no-salt-added tomatoes, garlic, basil, olive oil, white wine, and Italian herbs to create a rich, satisfying sauce. 

    I’ve made this recipe several times, and it has earned a permanent place in my kitchen.

    The best part?

    It doesn’t taste like “low sodium food.”

    It tastes like homemade spaghetti sauce.

    That’s an important distinction.

    When people first hear “low sodium,” they often imagine bland food that’s missing something. I’ve found the opposite to be true. Cooking from scratch allows me to control exactly what’s going into my meals while letting fresh ingredients do the work.

    For me, that’s become one of the biggest lessons of living with heart failure.

    Cooking at home gives me control.

    I know exactly what’s in my sauce.

    I know exactly how much sodium I’m eating.

    And I don’t spend the next two days wondering if one meal is going to leave me retaining fluid or watching the scale climb.

    One thing I especially appreciate about this recipe is how versatile it is. You can enjoy it exactly as written, or customize it with lean ground turkey, lean ground beef, mushrooms, peppers, or spinach. It’s one of those recipes that becomes your own over time while still keeping sodium under control. 

    Another bonus is that it freezes beautifully.

    Whenever I make it, I prepare a double batch and freeze individual portions. On nights when I’m tired or not feeling my best, I already have homemade sauce waiting in the freezer.

    If you’re beginning a low sodium lifestyle, don’t feel like you have to change everything overnight.

    Start with one recipe.

    One dinner.

    One small victory.

    Those small victories have a way of adding up.

    Today, spaghetti night is back at our house.

    It’s just a little healthier than it used to be.

    And honestly…

    I don’t miss the jar.


    ❤️ Greg’s Tip

    Don’t just freeze the sauce—label each container with the date and the estimated sodium per serving. On days when you’re tired or having a flare-up, you’ll have a heart-healthy meal ready to go without having to think twice.


    Recipe Credit

    This is not my original recipe. Full credit goes to Kelly Jensen at Low So Recipes, whose recipe inspired this meal. I’ve shared it because it’s become one of my favorite low sodium staples and I think others living with heart failure or following a low sodium lifestyle will enjoy it as much as I have. You can find the complete recipe here:

    Low Sodium Spaghetti Sauce Recipe by Low So Recipes

  • Homemade No-Salt Sazón Seasoning

    Homemade No-Salt Sazón Seasoning

    Sazón adds a warm, savory flavor and rich color to many dishes, but packaged seasoning blends can contain more sodium than I want in a meal. I started making my own version so I could enjoy the flavor while controlling the ingredients.

    This homemade blend contains no added salt and works especially well in ground turkey, chicken, rice, beans, soups, stews, and pasta dishes. We use it in our Pasta Shells with Ground Turkey recipe instead of store-bought sazón.

    Ingredients

    • 1 tablespoon ground coriander
    • 1 tablespoon garlic powder
    • 1 tablespoon ground cumin
    • 2 teaspoons dried oregano
    • 1 tablespoon ground annatto or turmeric
    • 1 teaspoon freshly ground black pepper

    Instructions

    Add all the ingredients to a small bowl and mix thoroughly. Transfer the seasoning to an airtight container or spice jar and store it in a cool, dry place.

    Stir or shake the blend before each use. Start with a small amount, taste the food as it cooks, and add more as needed. Because the blend contains no salt, you can adjust the flavor without adding unwanted sodium.

    Annatto provides the color and flavor traditionally associated with sazón. Turmeric can be used as a convenient substitute, although it produces a slightly different flavor.

    Making this blend at home is quick, inexpensive, and another small way my family and I have learned to prepare flavorful food with less sodium.

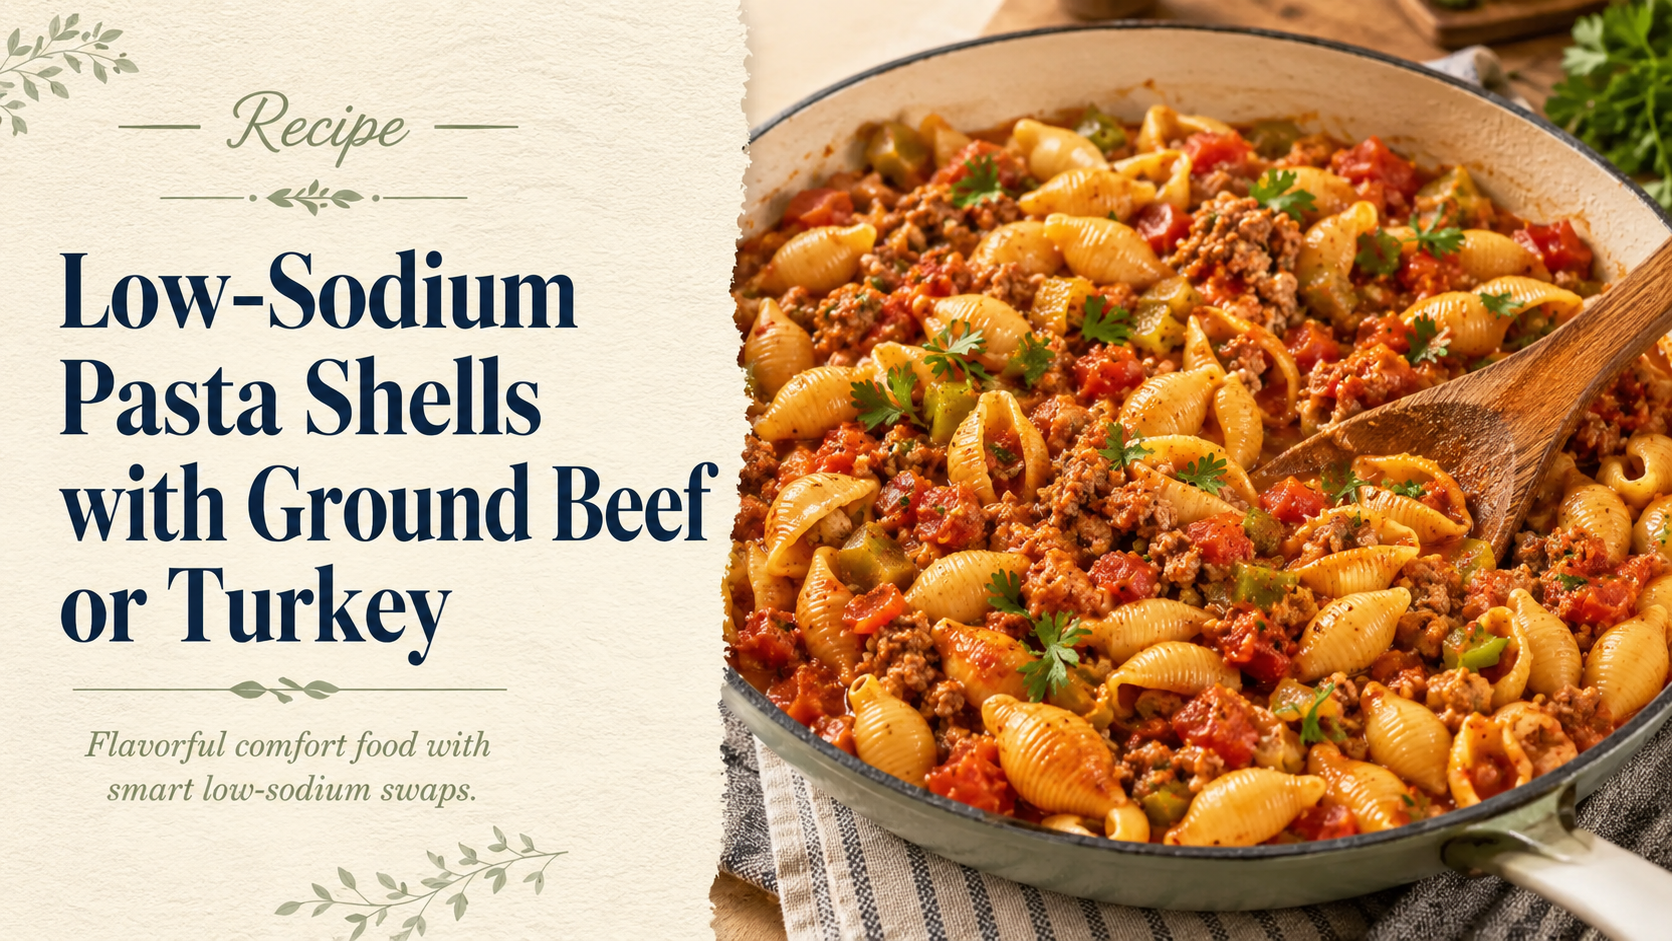
  • Pasta Shells With Ground Turkey: Our Family’s Lower-Sodium Version

    Pasta Shells With Ground Turkey: Our Family’s Lower-Sodium Version

    Some recipes become family favorites because they are fancy. Others become favorites because they are affordable, filling, easy to prepare, and taste great. This pasta dish checks all four boxes for us.

    Our version is adapted from Pasta Shells with Ground Beef from Sweet Pea’s Kitchen. We follow the basic idea of the original recipe but make a few changes that better suit our family and the way we are trying to eat.

    How We Make It Our Own

    Instead of ground beef, we use ground turkey. It works well with the pasta and tomato sauce while making the dish a little lighter.

    We also replace the packaged sazón seasoning with our own homemade salt-free blend. Packaged seasoning mixes can contain more sodium than expected, so making the seasoning ourselves gives us more control over what goes into the meal.

    For the broth, we use Swanson Unsalted Chicken Broth instead of regular chicken broth. It adds moisture and flavor without the added salt commonly found in standard broths.

    Combined with no-salt-added tomatoes and our homemade salt-free sazón, this substitution gives us much more control over the sodium in the finished dish. The total sodium will still depend on the other ingredients and serving size, so I always recommend checking each product label.

    Finally, we replace regular Rotel with Rotel Original No Salt Added Diced Tomatoes and Green Chilies. We still get the tomato and green-chile flavor without the added salt found in the regular version.

    Our Homemade Salt-Free Sazón Blend

    We combine:

    • 1 tablespoon ground coriander
    • 1 tablespoon garlic powder
    • 1 tablespoon ground cumin
    • 2 teaspoons oregano
    • 1 tablespoon ground annatto seeds or turmeric
    • 1 teaspoon freshly ground black pepper

    This makes a batch of seasoning. We use the amount needed for the dish in place of the packaged sazón and save the remainder for another meal.

    A Family-Friendly Meal

    Everyone in our family enjoys this recipe. It is inexpensive, satisfying, and flavorful without requiring complicated ingredients or techniques. The ground turkey, pasta shells, tomatoes, and homemade seasoning come together to make the kind of comforting meal that works well on a busy evening.

    We use the ingredient amounts and cooking method from the original Sweet Pea’s Kitchen recipe, substituting ground turkey, our homemade sazón, and no-salt-added tomatoes.

    A Note About Sodium

    These substitutions help reduce the sodium, but they do not automatically make the entire meal low in sodium. The original recipe also calls for tomato broth, which can be significant sources of sodium.

    Check the nutrition labels on every ingredient and use reduced-sodium or no-salt-added alternatives when available. The amount that is appropriate for you may depend on your personal dietary limits and the guidance you receive from your healthcare team.

    Nutrition information will vary depending on the ingredients and brands used. My comments are based on personal experience and are not medical or nutritional advice. Credit for the original recipe and cooking directions belongs to Sweet Pea’s Kitchen.